Thinking about a tiny home but don’t know where to start? You’re in the right place. This guide walks you through the 10 decisions you need to make, in the order you need to make them — from “is this right for me?” all the way to moving in.
Most getting-started guides jump straight to “pick a builder” or “here’s how to frame a wall.” But the reality is that the first 80% of the tiny home journey is decision-making, research, and planning — not construction. Getting these decisions right upfront saves you months of time, thousands of dollars, and a lot of stress.
This guide is independent. We’re not builders, we’re not selling you anything, and we’ll be honest about the hard bits.
Step 1: Define Your “Why”
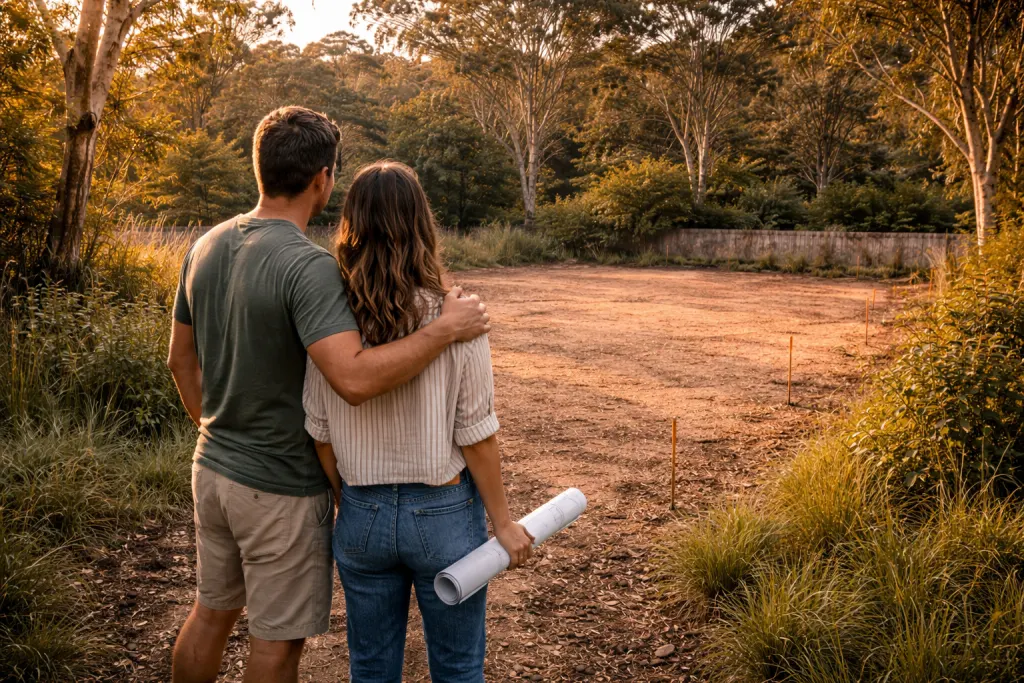
Before looking at a single floor plan, get clear on why you want a tiny home. Your motivation shapes every decision that follows — the type of home, where you put it, how much you spend, and what trade-offs you’re willing to make.
Common motivations:
- Downsizing & retirement — simplify life, reduce costs, free up equity
- Holiday home — a weekender or coastal escape without the big mortgage
- Off-grid living — self-sufficiency, sustainability, remote lifestyle
- First home — an affordable path onto the property ladder
- Investment — Airbnb rental income from a tiny home
- Granny flat — a secondary dwelling for family or rental income
Try this: Write down your top 3 reasons in one sentence each. If you can’t articulate why, you’re not ready to commit money yet — and that’s fine.
Pro tip: If you’ve never stayed in a tiny home, do that first. Book a weekend in a tiny home Airbnb and see how you feel about the space. Nothing beats lived experience for testing whether tiny living suits you.
Step 2: Choose Your Type
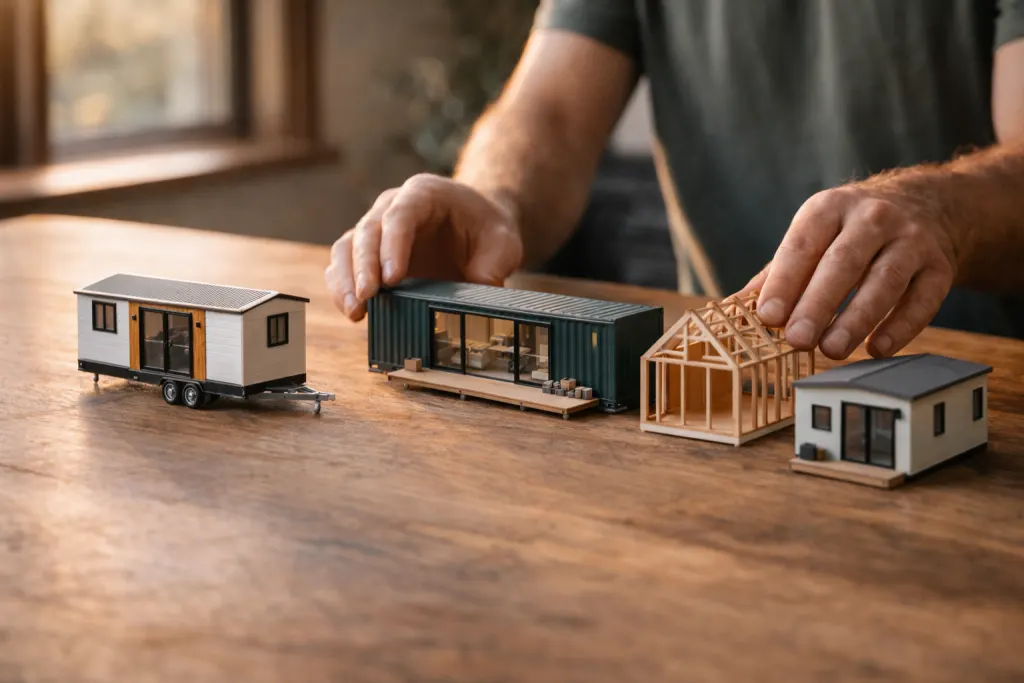
This is the single most consequential decision because it determines your regulatory pathway, your budget, and your lifestyle. Most beginners don’t realise how different the options are.
Read our complete guide to types of tiny homes for the full comparison, but here’s the summary:
| Type | Size | Cost | Mobility | Best for |
|---|---|---|---|---|
| THOW (on wheels) | 15–30 sqm | $80k–$160k | Towable | Flexibility, avoiding some approvals |
| Modular (prefab) | 20–60 sqm | $90k–$200k+ | Permanent | Quality, speed, permanent dwelling |
| Container (converted) | 15–55 sqm | $80k–$180k | Relocatable | Budget, off-grid, industrial look |
| Flat-pack kit | 15–50 sqm | $45k–$120k | Permanent | DIY builders, remote sites |
| Granny flat | 30–60 sqm | $100k–$200k+ | Permanent | Easiest approval, adds property value |
The key distinction: A tiny home on wheels (THOW) is generally classified as a caravan by councils — it follows caravan rules. A fixed tiny home on foundations follows the same building and planning rules as any house. These are completely different regulatory tracks. Choose your type before doing anything else.
Step 3: Understand Your Regulations
Do this before spending any money. The regulations determine whether your plan is actually feasible.
Every state has different rules, and within each state, councils can vary significantly. We’ve written detailed guides for every state and territory:
- New South Wales — Clause 77 THOW exemption, CDC for granny flats up to 60 sqm
- Queensland — no statewide framework, council by council
- Victoria — Surf Coast THOW trial, ResCode standards
- South Australia — Planning and Design Code, 70 sqm ancillary accommodation
- Western Australia — R-Codes reform, Esperance THOW recognition
- Tasmania — 60 sqm secondary residence, LUPAA
- Northern Territory — 75–80 sqm independent units, cyclone zones
- ACT — Crown leasehold, no local councils
5 questions to ask your council before committing:
- How does your planning scheme classify a tiny home / THOW / secondary dwelling?
- What approvals do I need for the type of tiny home I’m considering?
- Are there any overlays on my property (flooding, bushfire, heritage) that affect what I can build?
- What are the setback, height, and lot size requirements?
- Can you point me to any published guidelines or fact sheets on tiny homes?
Call your council. Don’t rely on what you’ve read online (including this guide). Regulations change, and councils interpret them differently. An informal conversation with the planning department can save you months. Get their answers in writing if possible.
For the full picture, read our guide: Can I put a tiny home on my land?
Step 4: Sort Out Your Land
Where you put your tiny home is as important as the home itself. Our land guide covers all the options in detail, but here’s the summary:
On your existing property — If you own a home with enough land, adding a secondary dwelling or parking a THOW may be your simplest path. Check minimum lot sizes for your council (typically 450–600 sqm for a secondary dwelling).
Buy land — Rural land is generally cheaper and councils tend to be more flexible. But you’ll need to manage your own services if you’re off the grid. Check zoning, access roads, slope, and whether utilities are available before buying.
Lease or licence land — Some landowners are open to hosting tiny homes on their property. The arrangement could be a formal lease or an informal licence. Make sure the terms are in writing — a licence and a lease have very different legal protections.
Tiny home community or caravan park — A growing number of communities and parks across Australia accept tiny homes. Expect to pay $150–$350/week for a site with services. Read our guide on tiny home communities.
A family member’s property — Common for THOWs. In NSW, Clause 77 allows a household member to live in a caravan on a property with an existing dwelling. Other states have different rules.
Step 5: Set Your Budget (Realistically)
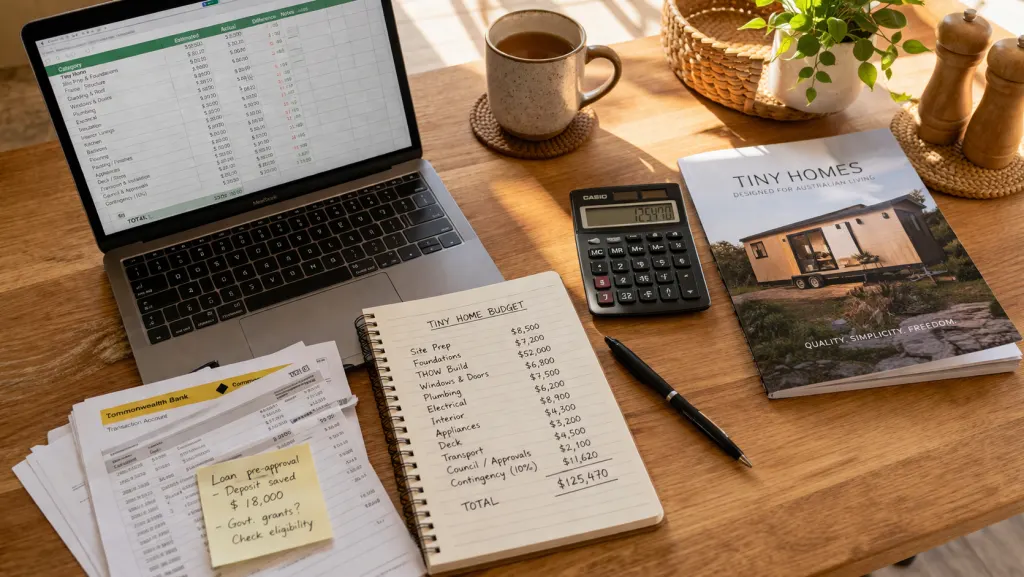
This is where most people underestimate. The sticker price of the home is only part of the total cost. A realistic budget needs to account for everything:
The home itself:
- Turnkey THOW from a builder: $80,000–$165,000
- DIY THOW build: $40,000–$90,000 in materials (plus 12–24 months of your time)
- Modular/prefab home: $90,000–$200,000+
- Flat-pack kit: $45,000–$120,000 (kit only — total project is roughly double)
- Granny flat: $100,000–$200,000+
The costs nobody tells you about:
- Council application and approval fees: $2,000–$10,000
- Site preparation (clearing, levelling, footings): $3,000–$15,000
- Utility connections (water, sewer, electrical): $5,000–$20,000
- Transport and delivery: $1,000–$5,000+
- Off-grid systems (solar, batteries, water tanks): $8,000–$25,000
- Insurance: $800–$2,000/year
- Tools and consumables (DIY builds): $2,000–$5,000
Rule of thumb: Budget 20–30% above the home price for total project costs.
For the full cost breakdown, read our detailed cost guide.
Step 6: Decide — Buy, Build, or Hybrid?
Three paths, each with different trade-offs:
Buy turnkey — A professional builder handles everything. You get a home in 8–16 weeks, with warranties, certifications, and insurance-ready documentation. Most expensive, but lowest risk and time commitment. Browse Australian tiny home builders.
Build it yourself (DIY) — The most affordable option, but requires significant building skills and 12–24 months of your life. You’ll still need licensed tradespeople for electrical, plumbing, and gas. Consider the hidden costs: time off work, tool purchases, and the learning curve. One DIY builder spent $45,000 in materials but warned the real cost includes a year off work and enormous family support.
Hybrid — Many people choose a middle path: buy a shell or lock-up stage from a builder (framing, cladding, roof, windows) and do the interior fit-out themselves. This saves money while ensuring the structural work is done professionally. Some builders specifically offer this as an option.
A warning about compliance: There is a lot of misinformation about tiny homes. Some people buy buildings that don’t comply with Australian Standards — always ask for written certification that building, plumbing, and electrical work complies with the NCC. If a deal seems too good to be true, check the certifications.
Step 7: Choose Your Builder (or Plan Your DIY)
If you’re buying from a builder, here’s what to look for:
Questions to ask every builder:
- Are you a registered/licensed builder in this state?
- Can I see completed homes in person or visit a display village?
- What certifications come with the home (electrical, plumbing, structural)?
- What’s your current lead time?
- What’s included in the price — and what’s not?
- Do you offer a warranty? What does it cover?
- Can you provide references from past clients?
Red flags:
- No builder’s licence or registration
- No written contract or vague inclusions
- Prices significantly below market (ask why)
- No past client references
- Pressure to pay large deposits upfront
Browse our builder directory to compare verified Australian builders by state, type, and price range. Read our full guide on choosing a builder.
If you’re going DIY: Look into owner-builder permits in your state, courses like Tiny House University and The Bower’s hands-on workshop programs, and join the Australian Tiny House Association community for support. Remember that electrical, plumbing, and gas work must always be done by licensed tradespeople — this is non-negotiable.
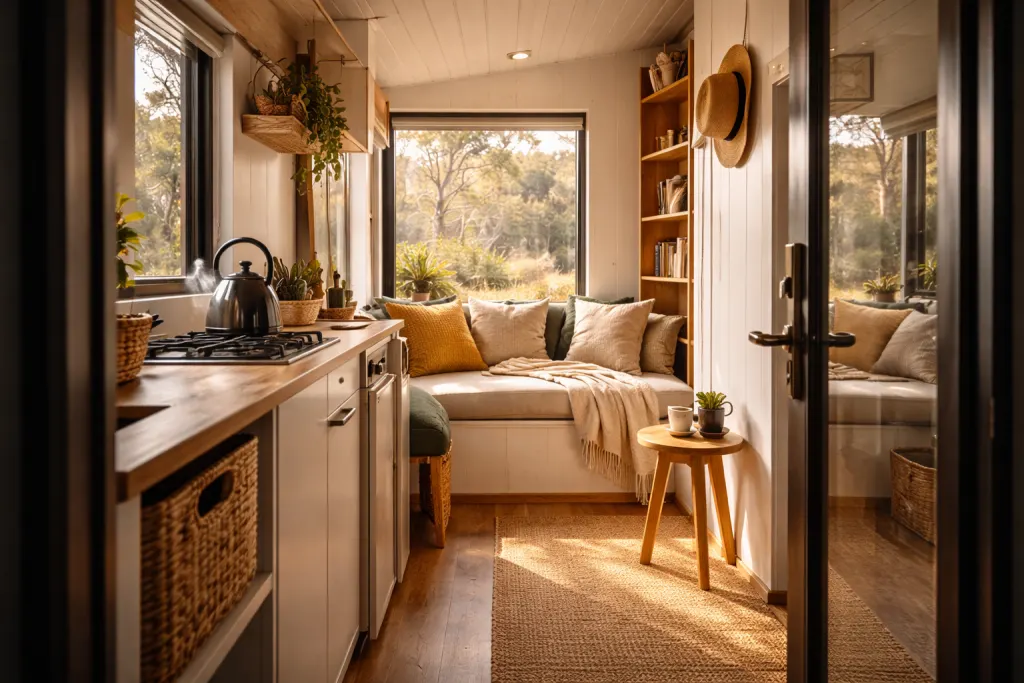
Step 8: Design Your Layout
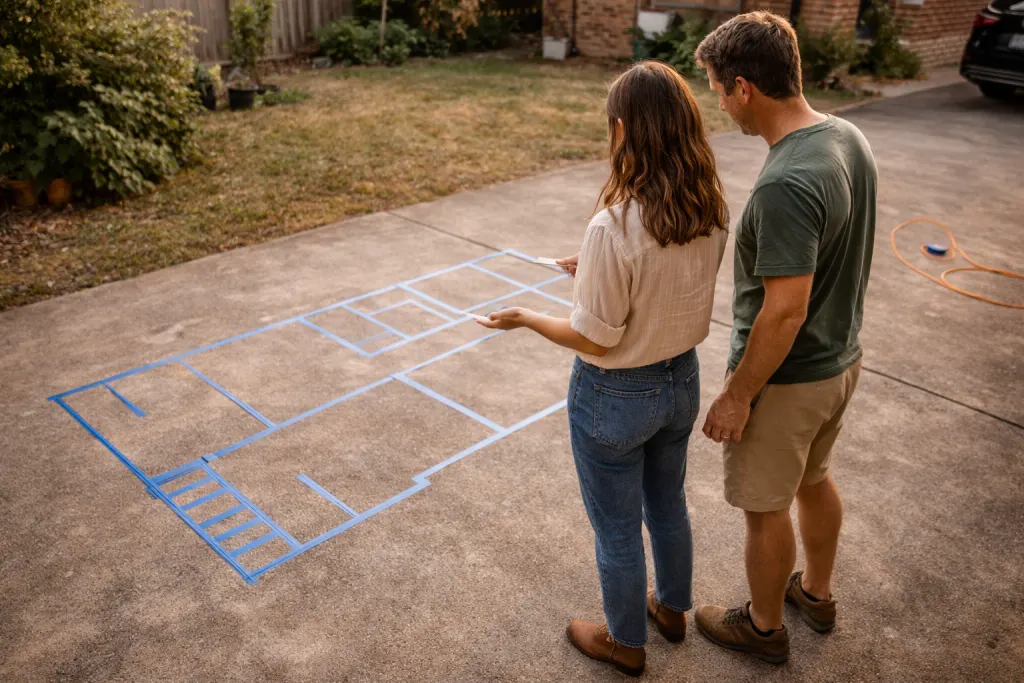
Every square metre matters in a tiny home. A few principles that experienced tiny home owners consistently recommend:
Think about your daily routine first. How will you cook, work, sleep, shower, and store your things? Walk through a typical day mentally and note what you need within arm’s reach.
Tape it out. Before finalising any design, tape out the dimensions of your planned home on a driveway, garage floor, or large room. Walk through it, sit in it, cook in it. This physical experience of the space tells you more than any floor plan.
Multi-functional everything. Stairs that are storage drawers. A dining table that folds into a desk. A couch that converts to a guest bed. In a tiny home, every piece of furniture needs to earn its space.
Prioritise what matters to you. Don’t try to shrink a normal house — decide what you actually care about. Some people want a full-sized kitchen and accept a smaller bathroom. Others want a spacious bathroom and are happy with a compact kitchen. There’s no right answer.
Loft considerations. Sleeping lofts are space-efficient but come with trade-offs: climbing a ladder, limited headroom, heat rising in summer. Ground-floor bedrooms are more accessible but use more floor area. Think about this carefully if you have mobility concerns.
Step 9: Plan Your Services
How your home connects to power, water, and waste is a critical decision — especially if you’re going off-grid.
Power:
- Grid-connected — Simplest option. Your home connects to the electricity network like any house.
- Solar + battery — A typical tiny home uses 2–8 kWh/day. A 2–3 kW solar array with a 5–10 kWh battery bank covers most needs. Costs $8,000–$25,000. Read our solar setup guide.
Water:
- Mains water — Connected to town supply. Straightforward for secondary dwellings.
- Rainwater tanks — Viable for off-grid setups. Tank size depends on roof area and rainfall. A 10,000–20,000 litre tank suits most tiny homes. Add filtration for drinking water.
Waste:
- Sewer/septic — Connected to town sewerage or an approved on-site system. Required for secondary dwellings in most areas.
- Composting toilet — Popular for THOWs and off-grid builds. No water usage, no sewer connection needed. Brands like Nature’s Head and GreenLoo are common in Australia.
- Greywater — Kitchen and shower water can be diverted to garden irrigation in many areas, but check your state’s EPA requirements.
Internet:
- Fixed broadband / NBN — If connected to services
- Starlink — Increasingly popular for remote/rural tiny homes. ~$139/month, good speeds
- 4G/5G fixed wireless — Signal boosters help in areas with patchy coverage
For the full breakdown, see our off-grid living guide.
Step 10: Move In and Adjust
Congratulations — you’re in. Here’s what to expect:
The first 2–4 weeks are an adjustment. Everything feels smaller than you expected. You’ll bump into things, run out of bench space, and wonder where to put your toaster. This is normal. Most tiny home owners say it takes about a month to settle in.
Downsize before you move, not after. Sort your possessions ruthlessly before moving day. If it doesn’t serve a function or bring you genuine joy, it doesn’t deserve space in a tiny home. Many people find this the most liberating part of the process.
Expect to iterate. Your first storage solution won’t be your best. Your kitchen workflow will evolve. You’ll buy hooks, shelves, and organisers you didn’t know you needed. Give yourself permission to experiment and adjust.
Connect with the community. The Australian tiny home community is welcoming and experienced. Join the Australian Tiny House Association, follow tiny home groups on Facebook, and attend events and open days when you can. The people who’ve already done it are your best resource.
Maintenance matters. A tiny home needs regular maintenance just like a conventional house — more so if it’s a THOW exposed to road vibration and weather. Check seals, roofing, plumbing connections, and structural joints regularly.
Your Next Steps
- Explore solutions — find the path that matches your motivation
- Check your state’s regulations — before spending any money
- Read the cost guide — set a realistic budget
- Browse builders — compare options by state, type, and price
- Subscribe to our newsletter — regulation updates, builder spotlights, and real stories
Frequently Asked Questions
How long does it take to get a tiny home in Australia?
From first research to moving in, expect 6–18 months depending on your path. A turnkey build from a professional builder takes 8–16 weeks once you’ve signed a contract, but the decision-making and approval process beforehand can take 3–6 months. DIY builds typically take 12–24 months. The biggest time factor is usually council approvals, not construction.
How much does it really cost — all in?
A realistic all-in budget (home + site + approvals + services) is typically $100,000–$250,000 for a professional build, or $60,000–$130,000 for a DIY build. The home price is only 70–80% of the total. See our detailed cost breakdown for the full picture.
Can I live in a tiny home permanently in Australia?
Yes, but the rules depend on your state, your council, and the type of home. The most established pathway is building a secondary dwelling (granny flat) on an existing residential property. THOWs can be occupied permanently in some circumstances — NSW Clause 77 is the clearest example. See can I put a tiny home on my land? for the full state-by-state breakdown.
Do I need to own land?
No. You can place a THOW on someone else’s property (with their permission and within council rules), lease land from a private landowner, or join a tiny home community. Owning land gives you the most control and options, but it’s not a prerequisite for tiny living.
What’s the single most important thing to do first?
Call your local council. Before you spend any money on plans, deposits, or materials, confirm that what you want to do is feasible where you want to do it. A 15-minute phone call can save you months of wasted effort. Ask the 5 questions listed in Step 3 above.
Is tiny home living right for me?
The best way to find out is to try it. Book a weekend stay in a tiny home Airbnb — there are dozens across Australia. Spend a few days actually living in the space: cooking, sleeping, working, showering. If it feels good after a weekend, you’ll probably love it full-time. If it feels claustrophobic, you’ve saved yourself a very expensive mistake.